Craft Room: Studio Shot
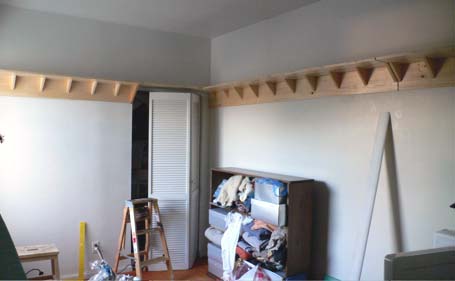
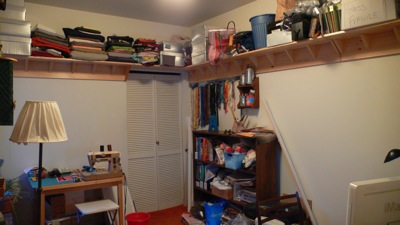
I forget sometimes to count my home improvement projects as craft. But I hand-crafted these shelves this summer, and I'm darned proud of them.

I made them myself out of straight pine lumber: 1 x 12 for the shelf itself, 1 x 8 for the support backing along the wall, and 1 x 4 cut into triangles (using my clear quilting ruler!) for the brackets. I cut everything myself, gave everything 3 coats of clear acrylic varnish, sanding after the first two coats. I planned it all myself, and even remembered to plan in lots of details, like two slightly smaller brackets where the coat closet door opens, and a bigger bracket where the stretch of unsupported shelf makes it over the closet door opening.
My big help came on the last day - my husband held things in place while I assembled, and my neighbor joined us in holding them up on the wall while I attached them to the wall. (Thanks, J & J!) I already found and marked the studs (again with a quilting tool, my chalk pencil - washes off the wall) and made a very messy but reliable diagram of where to place the brackets so that they didn't end up over the studs. We have metal studs in our apartment and they're a total nightmare for putting things in/hanging things from, so I didn't want to miss a single point of attachment. Also due for thanks is my friend who took time out of a very busy Saturday to drive me to Lowe's for the lumber and dropped it off at my place.
For the record, no, I don't have the luxury of this whole room to myself, I share it with my husband and filing cabinets and our computer. Which sits on a monstrously large desk that I refinished. Still, pretty luxurious to have a separate room for all that, and now even more dee-luxe with custom shelving.
They're all loaded up now, though I still want them cleaner and emptier!

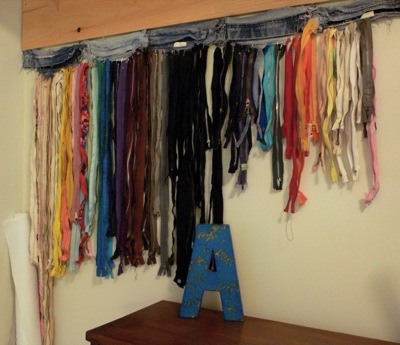
What's that in the corner? The Rainbow of Zipping Flavors! Ebay auction came with a few jeans zippers still in the jeans flies, and I had a zillion safety pins from the dollar store and I've always loved a rainbow.


I made them myself out of straight pine lumber: 1 x 12 for the shelf itself, 1 x 8 for the support backing along the wall, and 1 x 4 cut into triangles (using my clear quilting ruler!) for the brackets. I cut everything myself, gave everything 3 coats of clear acrylic varnish, sanding after the first two coats. I planned it all myself, and even remembered to plan in lots of details, like two slightly smaller brackets where the coat closet door opens, and a bigger bracket where the stretch of unsupported shelf makes it over the closet door opening.
My big help came on the last day - my husband held things in place while I assembled, and my neighbor joined us in holding them up on the wall while I attached them to the wall. (Thanks, J & J!) I already found and marked the studs (again with a quilting tool, my chalk pencil - washes off the wall) and made a very messy but reliable diagram of where to place the brackets so that they didn't end up over the studs. We have metal studs in our apartment and they're a total nightmare for putting things in/hanging things from, so I didn't want to miss a single point of attachment. Also due for thanks is my friend who took time out of a very busy Saturday to drive me to Lowe's for the lumber and dropped it off at my place.
For the record, no, I don't have the luxury of this whole room to myself, I share it with my husband and filing cabinets and our computer. Which sits on a monstrously large desk that I refinished. Still, pretty luxurious to have a separate room for all that, and now even more dee-luxe with custom shelving.
They're all loaded up now, though I still want them cleaner and emptier!

What's that in the corner? The Rainbow of Zipping Flavors! Ebay auction came with a few jeans zippers still in the jeans flies, and I had a zillion safety pins from the dollar store and I've always loved a rainbow.


3 Comments:
Hey good for you on making your own shelves. I'm working on some home projects myself and it's a good reminder that it too is almost like a form of crafting...
It IS a form of crafting. You plan things, cut things, stick things together. It's Woodcraft!
wow! I am impressed. Nice work :)
Post a Comment
<< Home